
Hello again,
Good friend Hammon Buck of Plants Unlimited sent this great email out a day or so ago. The following from Plants Unlimited gives many great tips on what to watch for and what to do in your garden after all this cold rain we have received. (I make a few comments in italics). Plants Unlimited is located in Rockport ME and is well worth a visit!
"1) AVOID tilling your gardens until the soil has dried. BE PATIENT and allow the soil to dry! Try to avoid walking right next to the plants while the soil is saturated. During this time plants, and root systems, are very vulnerable to damage from stepping on them. Walking near plants can also cause soil impaction, which can limit root growth. Compacted soil has less air for proper root development. This is not a big concern if you have a well designed raised bed garden where you can reach each plant without stepping near them.
2) AVOID mowing wet grass. Again, let the grass dry because mowing wet grass is very damaging to your lawnmower, uses more gas and also can compact the soil under your grass. When the grass dries, you might need to mow it twice if your grass is tall. First, set your mower fairly high and on the second mow, lower your blades. (Note: a higher grass setting is much healthier for your lawn as well!)
3) PREPARE for slugs and snails. They were beginning to appear before all this rain and now, they'll be out in full force.... (We recommend Slug Magic--an all natural but very safe product). Apply it now! Eliminate possible slug or snail hiding places. Slugs and snails love damp places that have hiding areas. Remove any boards, stones, or other items that are laying around in or around the garden.
4) After a very heavy rain you may need to replenish nutrients. Having heavy water runoff can carry nutrients from the soil. Make sure to replenish these nutrients with fish emulsion or an organic all-purpose fertilizer. (The natural foods last longest in the soil).
5) Keep an eye out for fungal or bacterial diseases. Damp, humid conditions are perfect for fungal and bacterial disease development. Diseases, such as powdery mildew, will spread very quickly in these conditions. Treat these diseases as soon as they are noticed. Waiting too long to act can mean serious trouble for your vegetable plants.
6) Keep an eye on emerging weeds. Weeds love to pop up soon after a storm. The sudden charge of moisture to the soil will encourage weeds to spring up almost overnight. Put down some type of mulch to prevent weeds and to help ease soil erosion.
7) Observe areas of poor drainage and low spots where water has collected in your yard and gardens. Can these problems be corrected with proper grading or drainage?
8) Look for exposed roots in newly planted vegetable or perennial gardens where the rain might have washed away the soil. Cover these roots with compost or soil.
9) Empty outside pot, saucers and containers that hold standing water. You'll eliminate mosquito breeding and also help your plants from being overwatered.
10) Clean out storm drains and any drainage ways in your yard. "
Thanks Hammon!
Mike Skillin
Skillin's Greenhouses
May 22, 2011
Sunday, May 22, 2011


Growing Beautiful and Fragrant Lilacs
Hello again,
Good gardening friend Paul Parent of the Paul Parent Garden Club sends out a great newsletter every week with pertinent gardening topics. I encourage you to go to his website to sign up for his newsletter. Paul can also be heard every Sunday morning from 6 AM to 10 AM at his website or at WBACH (104.7 FM) every Sunday morning from 6 AM to 9 AM. Paul recently sent this article out called "Growing Beautiful and Fragrant Lilacs" (I occasionally add a few comments in italics) and here it is:
"If you ask a gardener what the most fragrant plant in their garden is, the answer would most likely be the lilac plant. The lilac is a longtime favorite for most gardeners and it was even grown in the gardens of George Washington and Thomas Jefferson. Be sure to see some of the original lilac in their gardens when you visit their homes when the season is right for them to bloom. Lilacs are unique plants; if cared for properly and planted in the right spot, they will live for hundreds of years. Lilacs date back to the mid 1700s and were planted in our first botanical gardens and arboretums across the colonies.
Growing up in New England, I can always remember the lilacs at the Arnold Arboretum in Boston/ Brookline. These gardens are part of Harvard University, and the oldest public arboretum in North America. When the lilacs come into bloom the fragrance of the hundreds of lilacs in the garden is carried through the entire garden...
If you want to grow lilacs, select a location in your yard with full sun all day, though there are some varieties that will also tolerate a bit of shade. These varieties will have smaller and fewer flowers on the plants due to the shade. Sunshine is the number one reason your lilacs may not be flowering. Next to sunshine, ask what is the type of soil on your property and how it can affect the development of flowers? Lilacs prefer a rich soil that is well drained and never has standing water around it at any time of the year. One last piece to the puzzle is the pH or acidity level in your soils; lilacs do much better in a sweet soil than an acidic soil.
All soils can be changed by adding soil conditioners to them like peat moss, compost, animal manure, and even sand. If you can open up the soil and improve the texture of the soil, your plant will thrive. Sand will break apart the clay in your soils, allowing better air movement; peat moss will help hold moisture in a sandy soil that typically dries out during the heat of summer. Compost and animal manure will do both, plus help to make poor soil healthier and better able to hold nourishment and water.
If the soil around the lilacs contains clay, treat the area with a soil conditioner like Garden Gypsum from Soil Logic. In just a few weeks, your soil will expand and drainage will be greatly improved. For acidic soil, add lime stone, wood ashes or Magic-Cal from Jonathan Green to sweeten the soil and free up the phosphorus in your soil. Look at the ground in the area where you want to plant a new lilac. If you see moss growing, it is a signal that the soil is acidic and you will have to add soil sweeteners to help the lilac grow and flower. If you have an established plant that is not flowering very well and moss is growing in the area, apply soil sweeteners in the spring and fall until the plant begins to flower.
Lilacs will also grow better if you can remove the grass growing around the plant and create a mulch bed 2 to 3 feet in diameter at the base of the plant. Grass and weeds will rob the plant of moisture during the summer and nutrition during the growing season; this completion will limit the plant's ability to make new shoots at the base of the plant. A layer of bark mulch 2 to 3 inches thick will go a long way toward helping your plants prosper. (Consider using a good compost for this task!)
When the plants are young, it is very important to remove faded flowers from the plant. This cleaning prevents the plant from using its energy to make useless seed pods, and that energy will be used to make additional foliage on the plant. Pruning is also very important on both young and established plants, as it will stimulate new growth on the plant.
The best time to prune your lilac is when the plant has finished flowering or, in the case of no flowers on your plant, when the lilacs in the neighborhood are in bloom. Do not be scared to prune, as pruning will stimulate new growth and that is where the flower buds will develop during the summer. Say to your lilac, "I am doing this for your own good." Begin by removing any dead or damaged branches from the plant. You should remove 1/3 of the foliage on the taller growing branches. If some branches are very tall, cut them to your waist and leave this tall stump in the clump. Strong plants will develop new growth in the shape of a broom from this stump, and in just a couple of years these new shoots will be in bloom. You can also cut the branch to a foot from the ground and shoots will develop on it also.
Older plants can be rejuvenated by removing 1/3 of the branches each year for three years and allowing the new shoots that develop at the base to take over the plant. Those new shoots that develop at the base should be thinned by 1/3. You should remove the small, weak looking ones, keeping the thick and strong looking shoots to replace the older branches.
New lilac plants should be planted with compost and mycorrhizae to help the plant get established quickly before the heat of summer arrives. (An excellent source of mycorrhizae for this job is Flower Tone or Tree Tone by Espoma.) Water 2 times a week until the fall and fertilize the plant in September with mycorrhizae again.
The only problem lilacs have is powdery mildew on the foliage, and that can be prevented with 2 or 3 applications of Serenade organic fungicide beginning in mid-June and repeated every two weeks. Good air circulation around the plant and keeping plants away from irrigation systems that splash water on the foliage will prevent this problem.
If you like lilacs, look for a new hybrid variety just introduced this spring called 'Bloomerang.' (sold right here at Skillin's!) This new variety will give you months of flowers, not just weeks, as it is a repeat bloomer. It will flower in the spring for several weeks and, if you can remove the faded flowers, it will re-bloom in the mid-summer until frost. The beautiful fragrant flowers are lavender, and are great for cutting also. The plant will grow five feet tall and just as wide, very similar to the 'Miss Kim' hybrid; the flowers and foliage look similar also. This is a wonderful plant to have near a deck or patio where you spend time outside during the summer."
Thanks Paul!
Mike Skillin
Skillin's Greenhouses
May 22, 2011
Good gardening friend Paul Parent of the Paul Parent Garden Club sends out a great newsletter every week with pertinent gardening topics. I encourage you to go to his website to sign up for his newsletter. Paul can also be heard every Sunday morning from 6 AM to 10 AM at his website or at WBACH (104.7 FM) every Sunday morning from 6 AM to 9 AM. Paul recently sent this article out called "Growing Beautiful and Fragrant Lilacs" (I occasionally add a few comments in italics) and here it is:
 |
| Fragrant, Fragrant Lilacs! |
"If you ask a gardener what the most fragrant plant in their garden is, the answer would most likely be the lilac plant. The lilac is a longtime favorite for most gardeners and it was even grown in the gardens of George Washington and Thomas Jefferson. Be sure to see some of the original lilac in their gardens when you visit their homes when the season is right for them to bloom. Lilacs are unique plants; if cared for properly and planted in the right spot, they will live for hundreds of years. Lilacs date back to the mid 1700s and were planted in our first botanical gardens and arboretums across the colonies.
Growing up in New England, I can always remember the lilacs at the Arnold Arboretum in Boston/ Brookline. These gardens are part of Harvard University, and the oldest public arboretum in North America. When the lilacs come into bloom the fragrance of the hundreds of lilacs in the garden is carried through the entire garden...
If you want to grow lilacs, select a location in your yard with full sun all day, though there are some varieties that will also tolerate a bit of shade. These varieties will have smaller and fewer flowers on the plants due to the shade. Sunshine is the number one reason your lilacs may not be flowering. Next to sunshine, ask what is the type of soil on your property and how it can affect the development of flowers? Lilacs prefer a rich soil that is well drained and never has standing water around it at any time of the year. One last piece to the puzzle is the pH or acidity level in your soils; lilacs do much better in a sweet soil than an acidic soil.
All soils can be changed by adding soil conditioners to them like peat moss, compost, animal manure, and even sand. If you can open up the soil and improve the texture of the soil, your plant will thrive. Sand will break apart the clay in your soils, allowing better air movement; peat moss will help hold moisture in a sandy soil that typically dries out during the heat of summer. Compost and animal manure will do both, plus help to make poor soil healthier and better able to hold nourishment and water.
If the soil around the lilacs contains clay, treat the area with a soil conditioner like Garden Gypsum from Soil Logic. In just a few weeks, your soil will expand and drainage will be greatly improved. For acidic soil, add lime stone, wood ashes or Magic-Cal from Jonathan Green to sweeten the soil and free up the phosphorus in your soil. Look at the ground in the area where you want to plant a new lilac. If you see moss growing, it is a signal that the soil is acidic and you will have to add soil sweeteners to help the lilac grow and flower. If you have an established plant that is not flowering very well and moss is growing in the area, apply soil sweeteners in the spring and fall until the plant begins to flower.
Lilacs will also grow better if you can remove the grass growing around the plant and create a mulch bed 2 to 3 feet in diameter at the base of the plant. Grass and weeds will rob the plant of moisture during the summer and nutrition during the growing season; this completion will limit the plant's ability to make new shoots at the base of the plant. A layer of bark mulch 2 to 3 inches thick will go a long way toward helping your plants prosper. (Consider using a good compost for this task!)
When the plants are young, it is very important to remove faded flowers from the plant. This cleaning prevents the plant from using its energy to make useless seed pods, and that energy will be used to make additional foliage on the plant. Pruning is also very important on both young and established plants, as it will stimulate new growth on the plant.
The best time to prune your lilac is when the plant has finished flowering or, in the case of no flowers on your plant, when the lilacs in the neighborhood are in bloom. Do not be scared to prune, as pruning will stimulate new growth and that is where the flower buds will develop during the summer. Say to your lilac, "I am doing this for your own good." Begin by removing any dead or damaged branches from the plant. You should remove 1/3 of the foliage on the taller growing branches. If some branches are very tall, cut them to your waist and leave this tall stump in the clump. Strong plants will develop new growth in the shape of a broom from this stump, and in just a couple of years these new shoots will be in bloom. You can also cut the branch to a foot from the ground and shoots will develop on it also.
Older plants can be rejuvenated by removing 1/3 of the branches each year for three years and allowing the new shoots that develop at the base to take over the plant. Those new shoots that develop at the base should be thinned by 1/3. You should remove the small, weak looking ones, keeping the thick and strong looking shoots to replace the older branches.
New lilac plants should be planted with compost and mycorrhizae to help the plant get established quickly before the heat of summer arrives. (An excellent source of mycorrhizae for this job is Flower Tone or Tree Tone by Espoma.) Water 2 times a week until the fall and fertilize the plant in September with mycorrhizae again.
The only problem lilacs have is powdery mildew on the foliage, and that can be prevented with 2 or 3 applications of Serenade organic fungicide beginning in mid-June and repeated every two weeks. Good air circulation around the plant and keeping plants away from irrigation systems that splash water on the foliage will prevent this problem.
If you like lilacs, look for a new hybrid variety just introduced this spring called 'Bloomerang.' (sold right here at Skillin's!) This new variety will give you months of flowers, not just weeks, as it is a repeat bloomer. It will flower in the spring for several weeks and, if you can remove the faded flowers, it will re-bloom in the mid-summer until frost. The beautiful fragrant flowers are lavender, and are great for cutting also. The plant will grow five feet tall and just as wide, very similar to the 'Miss Kim' hybrid; the flowers and foliage look similar also. This is a wonderful plant to have near a deck or patio where you spend time outside during the summer."
Thanks Paul!
Mike Skillin
Skillin's Greenhouses
May 22, 2011
Tuesday, May 17, 2011
May (mid May) Garden Talks
Hello again,
Mid May brings soggy weather to Skillin's Country but the plants and lawns are growing. And the night time temps while raw are not frosty allowing some gardeners near the coast and in Portland to tempt fate by planting a little early. So far so good...although these raw temps will do great harm to vine crops like cukes, squashes, and pumpkins. Also basil does not like this cold. So no planting of vine crops and basil in Skillin's Country yet! But that does leave many plants that you CAN plant with no frost in the forecast.
Still, keep the frost blankets handy; just in case....
*This cold wet weather will bring fungus and mildews for sure to many plants. Use all natural Serenade to protect your plants against many diseases!
*Don't like the shape of your flowering forsythia? This is an excellent time to prune your forsythia--while some color still remains. Prune it to somewhat smaller than the shape you want--don't worry it will grow back quickly. Just keep the same proportions so that even growth will result in the shape you want!
*Mike's Must Have Perennial for the Week is the Creeping Phlox--aka Ground Phlox or Phlox Subulata. Read all about this great plant HERE.
*Forgive the appearance of our delivery area but take a look at the outstanding patio and pool area planters we can do for you! Great value too as these plantings will look lush and beautiful all summer and fall!

Keep these planters lush with regular feedings of Miracle Gro's Blossom Booster (sold only at independent garden centers like Skillin's) or with all natural Fish and Seaweed Food by Neptune's Harvest.
I recommend the Fish and Seaweed Food by Neptune's Harvest for all container grown vegetables as well!
*Got a great question today about asparagus. Established asparagus is growing well for people. Keep cutting it in portions you want to eat! Cutting asparagus will keep it producing for you into the season. The same holds true for rhubarb. Rhubarb stalks taste best when they are small and tender. So start cutting now for tasty rhubarb now and more growth and more rhubarb later!
*Margaret of Away to Garden has a great point about this misty, cool weather: TAKE ADVANTAGE of any bouts of cooler, moister weather to divide and move perennials. Water in well, and keep an eye out all season to watch that they don’t stress.
*Speaking of Margaret, crabapple season is upon us and Skillin's Country is just a perfect place to grow beautiful flowering crabapple and flowering cherry trees. Click HERE for a Crabapple Slideshow by Margaret of Away to Garden.
Mid May brings soggy weather to Skillin's Country but the plants and lawns are growing. And the night time temps while raw are not frosty allowing some gardeners near the coast and in Portland to tempt fate by planting a little early. So far so good...although these raw temps will do great harm to vine crops like cukes, squashes, and pumpkins. Also basil does not like this cold. So no planting of vine crops and basil in Skillin's Country yet! But that does leave many plants that you CAN plant with no frost in the forecast.
Still, keep the frost blankets handy; just in case....
*This cold wet weather will bring fungus and mildews for sure to many plants. Use all natural Serenade to protect your plants against many diseases!
*Don't like the shape of your flowering forsythia? This is an excellent time to prune your forsythia--while some color still remains. Prune it to somewhat smaller than the shape you want--don't worry it will grow back quickly. Just keep the same proportions so that even growth will result in the shape you want!
*Mike's Must Have Perennial for the Week is the Creeping Phlox--aka Ground Phlox or Phlox Subulata. Read all about this great plant HERE.
 |
| Mike's Must Have this Week: The Ground Phlox or Phlox Subulata! |

Keep these planters lush with regular feedings of Miracle Gro's Blossom Booster (sold only at independent garden centers like Skillin's) or with all natural Fish and Seaweed Food by Neptune's Harvest.
I recommend the Fish and Seaweed Food by Neptune's Harvest for all container grown vegetables as well!
*Got a great question today about asparagus. Established asparagus is growing well for people. Keep cutting it in portions you want to eat! Cutting asparagus will keep it producing for you into the season. The same holds true for rhubarb. Rhubarb stalks taste best when they are small and tender. So start cutting now for tasty rhubarb now and more growth and more rhubarb later!
*Margaret of Away to Garden has a great point about this misty, cool weather: TAKE ADVANTAGE of any bouts of cooler, moister weather to divide and move perennials. Water in well, and keep an eye out all season to watch that they don’t stress.
*Speaking of Margaret, crabapple season is upon us and Skillin's Country is just a perfect place to grow beautiful flowering crabapple and flowering cherry trees. Click HERE for a Crabapple Slideshow by Margaret of Away to Garden.
Monday, May 16, 2011
Phlox Subulata--Creeping Phlox
Hello again,
Good gardening friend Paul Parent of the Paul Parent Garden Club sends out a great newsletter every week with pertinent gardening topics. I encourage you to go to his website to sign up for his newsletter. Paul can also be heard every Sunday morning from 6 AM to 10 AM at his website or at WBACH (104.7 FM) every Sunday morning from 6 AM to 9 AM. Paul recently sent this article out called "Phlox Subluta" (I occasionally add a few comments in italics) and here it is:
"Back in the days when this country was considered "The Colonies," our gardeners exported phlox plants to Great Britain. That's right, North America is the home to the entire phlox family of plants. Of the 70 species of phlox available, all but one is native. The botanical name for phlox in Greek means "flame," because the plants grew flowers in bright hot-looking colors. If you were a botanist, you would call the flower that the phlox makes a "salverform" bloom. A simple definition of "salverform" is a tiny tube-like flower that opens into a trumpet-shaped flared or flattened face with five petals. Most species produce these flowers in clusters that are rounded and believe it or not, even the ground phlox produces flowers in this rounded flower cluster. Next time you're out in your garden, lift up a side shoot from your clump and look closely at the flowers. What looks to be a carpet of single flowers is really small clusters of flowers covering the plant--check it out.
When most gardeners think of phlox they think of the tall-growing phlox with beautiful ice-cream cone shaped flower clusters. They think of the warm summer nights with cool colors of lavender-blue, purple, mauve, pink red and white flowers standing up tall your garden. Summer-flowering phlox is nice, but to me the ground covering varieties are more exciting, because at this time of the year color in the perennial garden is still very limited. Most perennials are still dormant or just beginning to poke through the soil, but this wonderful plant is in full bloom. Not only that, but the perennial ground phlox is evergreen to semi-evergreen, and on those cold winter days when snow is not covering the ground the phlox is greener than your lawn. The ground phlox will tolerate temperatures down to -40 to -50 degrees--how many of your perennial flowers can tolerate that and stay green all winter long? Not many!
Ground phlox grow like a carpet, hugging the ground. They are creepers, covering even rocks in your garden and creating a mat of foliage that will cascade or trail over a short wall. Ground phlox will grow on or over any surface as well as obstacles; truly a unique flowering plant. During April we all crave color and the weather can still be cold and unsettled, but this plant does develop flowers that will stay in bloom on the plant even if the temperatures dip below freezing. For this to happen, your plant must have good drainage; otherwise it will suffer from root rot during cold, wet weather. The roots of the ground phlox grow don't grow very deep in the garden. If your soil is on the sandy side you may have to water during the summer months if the plant is growing in full sun or the summer is hot and dry.
Ground phlox will flower for 2 to 3 weeks during April or early May. In a more northerly growing area the spring time temperatures always determine the flowering time. When plants finish flowering, shear back the plant to help control the size of the plant and encourage it to stay full and thick. As the plant ages, it will begin to die out in the center; that is normal. Dig it up, divide the plant into sections, and remove the dead sections from the clump. Plant the outer edges as clumps, with fresh soil that you have conditioned with compost or animal manure. If you can add mycorrhizae when planting, it will help stimulate the new roots to form more quickly and the summer weather will help new growth to develop.
Ground phlox flowers come in shades of white, pink, purple, red, lavender-blue and a new hybrid pink and white striped variety called "Candy Stripe.' This plant can spread 2 to 3 feet wide and will grow to 6 to 9 inches tall. When the flowers fall the Kelly green foliage will begin to grow, it can spread 6 inches or more each summer. When you plant a young plant, the foliage will feel soft and smooth but as the plant ages, the foliage gets prickly and becomes needle-like, almost like a spruce tree. The once soft and flexible green stems will also get woody, turn brown, rough, and more rigid. This is your signal to divide the plant into small clumps 6 to 8 inches in diameter.
A soil that is slightly acidic to alkaline will work well to encourage new growth and many flowers. If your garden is near oaks and pines, I would suggest that you apply lime, wood ash, or Jonathan Green Mag-I-Cal every year to keep acidity levels down. Fertilize in the spring when the flowers begin to fade with a good perennial fertilizer such as Flower-Tone. (Or if your phlox are part of your lawn area like mine twice yearly lawn feedings with a good all around organic fertilizer will keep the phlox well fed.)
If you plant ground phlox in the front of your border, it will creep out into your lawn if not pruned after flowering. Grass will also grow into your flower bed from the edge and can create a problem if you do not edge the perennial bed every year. If the grass gets into the plant bed it may be necessary to dig it up and manually pull the grass and its roots from the clump. It is best to set plants 12 inches from the edge of the bed to prevent problems.
If you have a steep bank that is difficult to mow and you're looking for a ground cover, the ground phlox could be the right plant for you. Space plants on 18 inch centers in staggered rows and in a couple of years it will all grow together, creating a wonderful flowering hillside in the spring. When the flowers fade use the lawn mower to cut back the plants to keep them short and thick growing. Fertilize over the top of the foliage with organic fertilizer when rain is in the forecast or use your sprinkler to wash the food off the foliage into the ground.
Insects and disease problems are minimal, but if you see the foliage begin to bleach out a bit, it could be red spider mites. If this occurs spray the foliage with Tree and Shrub Systemic Insecticide to control the problem. The ground phlox does not get powdery mildew like the taller growing summer-flowering phlox does. Powdery mildew is the most destructive disease of the taller growing relative and many people do not grow phlox because of it. New resistant varieties are now available and better systemic fungicides are also available. If you want spring color that will brighten up your gardens at this time of the year there is no better plant than the ground phlox. Enjoy!"
Thanks Paul!
Mike Skillin
Skillin's Greenhouses
May 16, 2011
Good gardening friend Paul Parent of the Paul Parent Garden Club sends out a great newsletter every week with pertinent gardening topics. I encourage you to go to his website to sign up for his newsletter. Paul can also be heard every Sunday morning from 6 AM to 10 AM at his website or at WBACH (104.7 FM) every Sunday morning from 6 AM to 9 AM. Paul recently sent this article out called "Phlox Subluta" (I occasionally add a few comments in italics) and here it is:
"Back in the days when this country was considered "The Colonies," our gardeners exported phlox plants to Great Britain. That's right, North America is the home to the entire phlox family of plants. Of the 70 species of phlox available, all but one is native. The botanical name for phlox in Greek means "flame," because the plants grew flowers in bright hot-looking colors. If you were a botanist, you would call the flower that the phlox makes a "salverform" bloom. A simple definition of "salverform" is a tiny tube-like flower that opens into a trumpet-shaped flared or flattened face with five petals. Most species produce these flowers in clusters that are rounded and believe it or not, even the ground phlox produces flowers in this rounded flower cluster. Next time you're out in your garden, lift up a side shoot from your clump and look closely at the flowers. What looks to be a carpet of single flowers is really small clusters of flowers covering the plant--check it out.
 |
| Various Colors of Ground or Creeping Phlox |
When most gardeners think of phlox they think of the tall-growing phlox with beautiful ice-cream cone shaped flower clusters. They think of the warm summer nights with cool colors of lavender-blue, purple, mauve, pink red and white flowers standing up tall your garden. Summer-flowering phlox is nice, but to me the ground covering varieties are more exciting, because at this time of the year color in the perennial garden is still very limited. Most perennials are still dormant or just beginning to poke through the soil, but this wonderful plant is in full bloom. Not only that, but the perennial ground phlox is evergreen to semi-evergreen, and on those cold winter days when snow is not covering the ground the phlox is greener than your lawn. The ground phlox will tolerate temperatures down to -40 to -50 degrees--how many of your perennial flowers can tolerate that and stay green all winter long? Not many!
Ground phlox grow like a carpet, hugging the ground. They are creepers, covering even rocks in your garden and creating a mat of foliage that will cascade or trail over a short wall. Ground phlox will grow on or over any surface as well as obstacles; truly a unique flowering plant. During April we all crave color and the weather can still be cold and unsettled, but this plant does develop flowers that will stay in bloom on the plant even if the temperatures dip below freezing. For this to happen, your plant must have good drainage; otherwise it will suffer from root rot during cold, wet weather. The roots of the ground phlox grow don't grow very deep in the garden. If your soil is on the sandy side you may have to water during the summer months if the plant is growing in full sun or the summer is hot and dry.
Ground phlox will flower for 2 to 3 weeks during April or early May. In a more northerly growing area the spring time temperatures always determine the flowering time. When plants finish flowering, shear back the plant to help control the size of the plant and encourage it to stay full and thick. As the plant ages, it will begin to die out in the center; that is normal. Dig it up, divide the plant into sections, and remove the dead sections from the clump. Plant the outer edges as clumps, with fresh soil that you have conditioned with compost or animal manure. If you can add mycorrhizae when planting, it will help stimulate the new roots to form more quickly and the summer weather will help new growth to develop.
Ground phlox flowers come in shades of white, pink, purple, red, lavender-blue and a new hybrid pink and white striped variety called "Candy Stripe.' This plant can spread 2 to 3 feet wide and will grow to 6 to 9 inches tall. When the flowers fall the Kelly green foliage will begin to grow, it can spread 6 inches or more each summer. When you plant a young plant, the foliage will feel soft and smooth but as the plant ages, the foliage gets prickly and becomes needle-like, almost like a spruce tree. The once soft and flexible green stems will also get woody, turn brown, rough, and more rigid. This is your signal to divide the plant into small clumps 6 to 8 inches in diameter.
A soil that is slightly acidic to alkaline will work well to encourage new growth and many flowers. If your garden is near oaks and pines, I would suggest that you apply lime, wood ash, or Jonathan Green Mag-I-Cal every year to keep acidity levels down. Fertilize in the spring when the flowers begin to fade with a good perennial fertilizer such as Flower-Tone. (Or if your phlox are part of your lawn area like mine twice yearly lawn feedings with a good all around organic fertilizer will keep the phlox well fed.)
If you plant ground phlox in the front of your border, it will creep out into your lawn if not pruned after flowering. Grass will also grow into your flower bed from the edge and can create a problem if you do not edge the perennial bed every year. If the grass gets into the plant bed it may be necessary to dig it up and manually pull the grass and its roots from the clump. It is best to set plants 12 inches from the edge of the bed to prevent problems.
If you have a steep bank that is difficult to mow and you're looking for a ground cover, the ground phlox could be the right plant for you. Space plants on 18 inch centers in staggered rows and in a couple of years it will all grow together, creating a wonderful flowering hillside in the spring. When the flowers fade use the lawn mower to cut back the plants to keep them short and thick growing. Fertilize over the top of the foliage with organic fertilizer when rain is in the forecast or use your sprinkler to wash the food off the foliage into the ground.
Insects and disease problems are minimal, but if you see the foliage begin to bleach out a bit, it could be red spider mites. If this occurs spray the foliage with Tree and Shrub Systemic Insecticide to control the problem. The ground phlox does not get powdery mildew like the taller growing summer-flowering phlox does. Powdery mildew is the most destructive disease of the taller growing relative and many people do not grow phlox because of it. New resistant varieties are now available and better systemic fungicides are also available. If you want spring color that will brighten up your gardens at this time of the year there is no better plant than the ground phlox. Enjoy!"
Thanks Paul!
Mike Skillin
Skillin's Greenhouses
May 16, 2011
Sunday, May 1, 2011
Low Allergy Annuals
Eric J. Smith writes about his interest in many areas of Environmental concern including the Health impact of Toxic Chemicals in our Community. He recently wrote the following article about Low Allergy Annuals. This article and more outdoor plant growing information can be found right HERE at http://www.ezinearticles.com/. I have made some comments in italics.
"Annuals are mainly grown for their flowers as garden colour or cut flowers. Pollen from flowers is a major allergen so if you suffer from an allergy like hay fever it is wise to consider looking for low or no allergen flowering plants for your garden.
I have suffered from hay fever since I was a kid. As a country boy I was introduced to the allergy while carting hay on my uncles property. Over the years I have come to know the types of plants that cause the allergy to flare up as well as those that have no effect on it at all. I have also noticed some heavily pollinated flowers that for one reason or another do not affect my hay fever while others that I would expect to be low allergen have made the condition worse.
Despite my hay fever I established a career in the Horticultural industry working around both high and low allergen flowers.
Some of the flowers I have found to be low allergen include:
Lobelia (Lobelia erinus)
Lobelias do not need a lot of water but should not be allowed to dry out either. A Summer growing annual with flowers in shades of blue, white, pink and mauve. Blue is the most common colour in most gardens. These low allergy plants are good bedding options and grow well in pots as well as being commonly grown in borders. Lobelias are low growing reaching a height of around 20cm.
Begonia (Begonia semperflorens)
Begonias are Perennials but usually treated as annuals. Aside from African Violets, these Begonias are my favourite plant. Begonias love an organically fertile soil in Full sun or Part shade. Begonias work well as border plants, in beds or in pots. Begonias are well adapted to growing indoors, their low allergen grouping makes them ideal for this environment. The season of interest for Begonias is Summer.
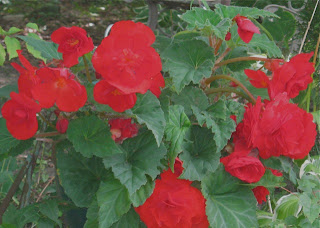
Impatiens (Impatiens - Annual species)
Impatiens are worth a mention. These hardy annuals grow to a height of up to 1.5 metres. Impatiens like a Part shade aspect with the season of interest being Summer."
 (Exciting impatiens--great for flower beds, boxes or hangers!)
Impatiens and begonias are extremely attractive and very reliable for a long flowering season in the summer garden! We love them here at Skillin's!
To read the entire article published by Eric J Smith please click HERE!
Mike Skillin
Skillin's Greenhouses
May 1, 2011
"Annuals are mainly grown for their flowers as garden colour or cut flowers. Pollen from flowers is a major allergen so if you suffer from an allergy like hay fever it is wise to consider looking for low or no allergen flowering plants for your garden.
I have suffered from hay fever since I was a kid. As a country boy I was introduced to the allergy while carting hay on my uncles property. Over the years I have come to know the types of plants that cause the allergy to flare up as well as those that have no effect on it at all. I have also noticed some heavily pollinated flowers that for one reason or another do not affect my hay fever while others that I would expect to be low allergen have made the condition worse.
Despite my hay fever I established a career in the Horticultural industry working around both high and low allergen flowers.
Some of the flowers I have found to be low allergen include:
Lobelia (Lobelia erinus)
Lobelias do not need a lot of water but should not be allowed to dry out either. A Summer growing annual with flowers in shades of blue, white, pink and mauve. Blue is the most common colour in most gardens. These low allergy plants are good bedding options and grow well in pots as well as being commonly grown in borders. Lobelias are low growing reaching a height of around 20cm.
Begonia (Begonia semperflorens)
Begonias are Perennials but usually treated as annuals. Aside from African Violets, these Begonias are my favourite plant. Begonias love an organically fertile soil in Full sun or Part shade. Begonias work well as border plants, in beds or in pots. Begonias are well adapted to growing indoors, their low allergen grouping makes them ideal for this environment. The season of interest for Begonias is Summer.
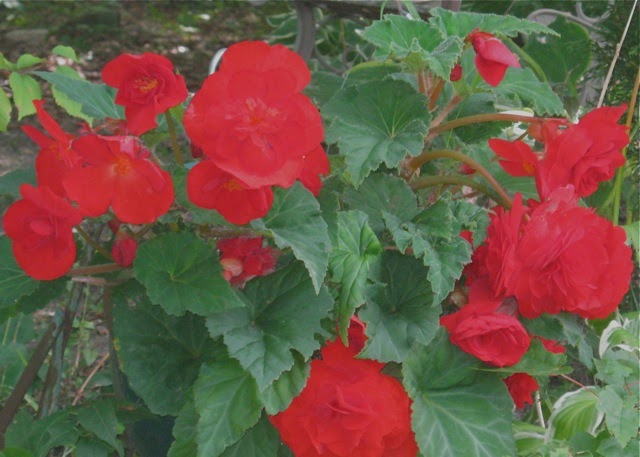
Non Stop Red Begonia--awesome plant!
Impatiens (Impatiens - Annual species)
Impatiens are worth a mention. These hardy annuals grow to a height of up to 1.5 metres. Impatiens like a Part shade aspect with the season of interest being Summer."

Impatiens and begonias are extremely attractive and very reliable for a long flowering season in the summer garden! We love them here at Skillin's!
To read the entire article published by Eric J Smith please click HERE!
Mike Skillin
Skillin's Greenhouses
May 1, 2011
Monday, April 25, 2011
Growing Strawberries
Hello again,
Good gardening friend Paul Parent of the Paul Parent Garden Club sends out a great newsletter every week with pertinent gardening topics. I encourage you to go to his website to sign up for his newsletter. Paul can also be heard every Sunday morning from 6 AM to 10 AM at his website or at WBACH (104.7 FM) every Sunday morning from 6 AM to 9 AM. Paul recently sent this article out called "Growing Strawberries" (I occasionally add a few comments in italics) and here it is:
"If you're looking to grow the most luscious of all the berries that can be grown in your backyard garden, look no further than the strawberry. When ripe and freshly picked from your garden, there is no better tasting berry for its sweet flavor than this easy to grow plant--the strawberry. Like any other fruit or berry, the picking season is short, so be sure to save room in your freezer for those cold days of winter when you crave a sweet treat.
Strawberries will grow best in full sun in an area that is sheltered from harsh winds. The plants will still grow if they are in partial shade for a few hours but the production of fruit will be less. Avoid planting in low spots in your yard, like the bottom of a hill, to prevent frost pocket problems early in the season. One other tip--do not plant in the same area where you recently grew potatoes or tomatoes in the last 3 years; it will work against you.
Strawberries are not picky about the soil they grow in, as long as it is well drained. Wet soil during the spring can and will rot the roots of the plants. Wet spots that freeze during the winter, forming ice, will kill the plants over the winter. Soil preparation is the key to great strawberries. If you prepare the planting bed ahead of time, you will save a lot of problems later. Add plenty of organic matter like peat moss, composted or dehydrated animal manure, or rich compost (I am not a fan of peat moss--not well draining--and dehydrated manure is hard to find. Composted manure and/or Coast of Maine Quoddy Blend is a great way to go) to the garden and blend it 6 to10 inches deep. If your soil is heavy with clay, add coarse sharp sand, like what is used to build the base of a brick walkway. I much prefer gypsum to break up sharp clay instead of coarse sand! Paul goes on to mention gypsum....
I also suggest using a product like garden gypsum to help break up clay soils and apply garden lime to the soil as needed to keep the soil almost neutral--a pH of 6 to 6.5 is best. Remember the plants will be there for 3 to 4 years, so do it right the first time. Another tip for you is to plant strawberries in a raised bed. All you have to do is dig out the soil from the walkways 2 to 3 inches deep and add to the planting bed. If you get a lot of rain in the spring, the extra water will have someplace to go and not hurt the roots of the plant.
Strawberries can be planted two ways in the garden: as staggered rows that are allowed to fill in the entire planting bed or as evenly spaced plants to be grown as individual plants. Staggered rows that fill in the planting bed will give you more fruit, but in time the berries will get smaller because of competition with other plants. Plants grown on individual mounds will have much larger fruit but fewer berries. Each average strawberry plant should produce one half to one pound of berries per plant for the three years they are in your garden. I like a staggered row concept but one that allows you to grow rows by year. In other words keep all the plants or runners from one year together!
Spacing is 15 to 18 inches in between plants, 3 to 4 plants wide per planting bed; this will make it easier to harvest berries later. When you plant your strawberries, be sure to set plants in the ground at the same depth in the garden that they originally grew in the pot. Look for a green ring around the short stem of the plant and just barely cover it with soil. Spread the roots out in the garden soil to help them develop more easily, and make sure the leaves are not covered with soil.
I also like to spread straw on the ground around the plants to help choke out weeds, prevent slugs and snail problems and--best of all--keep the berries off the ground and clear of the soil. Place the straw around the plants and be sure to lift all foliage and berries off the soil; this will give you better air circulation and help prevent berry rot. Use barley or wheat straw--NEVER hay--and weeds will never be a problem.
New plants should be watered regularly until established, and during hot and dry growing periods. When the berries are ripening, keep water off them to prevent gray mold and other disease--water the soil, not the fruit. The best time to water is in the morning, so excess moisture can evaporate quickly off the berries with the morning sunshine. NEVER water strawberries late in the day or at night or you will have moldy berries.
Fertilize in the early spring as the foliage begins to develop and the flowers form. Use organic fertilizers,, as they feed slowly and last longer in the soil. Mycorrhizae added to the planting beds will produce stronger and more productive plants. If your soils are sandy be sure to add a pinch of Soil Moist Granules to the planting hole when you set the plants in the garden.
Your biggest problem will be BIRDS because they, like you, love strawberries. Just cover the berry plants with plastic netting at the first sign of the berries ripening and make sure the netting is raised above the plants so the birds cannot poke through the holes in the netting. Pick early in the day and pick often to keep them from eating your berries. In wet weather slugs can be a major problem but much less so if you use all natural Slug Magic to keep the slugs at bay!
One last thing: strawberries come as June-bearing plants or ever-bearing plants. June-bearing plants produce all at once, usually in 3 to 4 weeks, while ever-bearing plants produce for a much longer period of 6 to 8 weeks. Both produce about the same amount of berries overall; it depends on how fast you want them for your table. Enjoy! Enjoy!
Thanks to Paul Parent!
Mike Skillin
Skillin's Greenhouses
April 25, 2011
Good gardening friend Paul Parent of the Paul Parent Garden Club sends out a great newsletter every week with pertinent gardening topics. I encourage you to go to his website to sign up for his newsletter. Paul can also be heard every Sunday morning from 6 AM to 10 AM at his website or at WBACH (104.7 FM) every Sunday morning from 6 AM to 9 AM. Paul recently sent this article out called "Growing Strawberries" (I occasionally add a few comments in italics) and here it is:
"If you're looking to grow the most luscious of all the berries that can be grown in your backyard garden, look no further than the strawberry. When ripe and freshly picked from your garden, there is no better tasting berry for its sweet flavor than this easy to grow plant--the strawberry. Like any other fruit or berry, the picking season is short, so be sure to save room in your freezer for those cold days of winter when you crave a sweet treat.
Strawberries will grow best in full sun in an area that is sheltered from harsh winds. The plants will still grow if they are in partial shade for a few hours but the production of fruit will be less. Avoid planting in low spots in your yard, like the bottom of a hill, to prevent frost pocket problems early in the season. One other tip--do not plant in the same area where you recently grew potatoes or tomatoes in the last 3 years; it will work against you.
Strawberries are not picky about the soil they grow in, as long as it is well drained. Wet soil during the spring can and will rot the roots of the plants. Wet spots that freeze during the winter, forming ice, will kill the plants over the winter. Soil preparation is the key to great strawberries. If you prepare the planting bed ahead of time, you will save a lot of problems later. Add plenty of organic matter like peat moss, composted or dehydrated animal manure, or rich compost (I am not a fan of peat moss--not well draining--and dehydrated manure is hard to find. Composted manure and/or Coast of Maine Quoddy Blend is a great way to go) to the garden and blend it 6 to10 inches deep. If your soil is heavy with clay, add coarse sharp sand, like what is used to build the base of a brick walkway. I much prefer gypsum to break up sharp clay instead of coarse sand! Paul goes on to mention gypsum....
I also suggest using a product like garden gypsum to help break up clay soils and apply garden lime to the soil as needed to keep the soil almost neutral--a pH of 6 to 6.5 is best. Remember the plants will be there for 3 to 4 years, so do it right the first time. Another tip for you is to plant strawberries in a raised bed. All you have to do is dig out the soil from the walkways 2 to 3 inches deep and add to the planting bed. If you get a lot of rain in the spring, the extra water will have someplace to go and not hurt the roots of the plant.
Strawberries can be planted two ways in the garden: as staggered rows that are allowed to fill in the entire planting bed or as evenly spaced plants to be grown as individual plants. Staggered rows that fill in the planting bed will give you more fruit, but in time the berries will get smaller because of competition with other plants. Plants grown on individual mounds will have much larger fruit but fewer berries. Each average strawberry plant should produce one half to one pound of berries per plant for the three years they are in your garden. I like a staggered row concept but one that allows you to grow rows by year. In other words keep all the plants or runners from one year together!
Spacing is 15 to 18 inches in between plants, 3 to 4 plants wide per planting bed; this will make it easier to harvest berries later. When you plant your strawberries, be sure to set plants in the ground at the same depth in the garden that they originally grew in the pot. Look for a green ring around the short stem of the plant and just barely cover it with soil. Spread the roots out in the garden soil to help them develop more easily, and make sure the leaves are not covered with soil.
I also like to spread straw on the ground around the plants to help choke out weeds, prevent slugs and snail problems and--best of all--keep the berries off the ground and clear of the soil. Place the straw around the plants and be sure to lift all foliage and berries off the soil; this will give you better air circulation and help prevent berry rot. Use barley or wheat straw--NEVER hay--and weeds will never be a problem.
New plants should be watered regularly until established, and during hot and dry growing periods. When the berries are ripening, keep water off them to prevent gray mold and other disease--water the soil, not the fruit. The best time to water is in the morning, so excess moisture can evaporate quickly off the berries with the morning sunshine. NEVER water strawberries late in the day or at night or you will have moldy berries.
Fertilize in the early spring as the foliage begins to develop and the flowers form. Use organic fertilizers,, as they feed slowly and last longer in the soil. Mycorrhizae added to the planting beds will produce stronger and more productive plants. If your soils are sandy be sure to add a pinch of Soil Moist Granules to the planting hole when you set the plants in the garden.
Your biggest problem will be BIRDS because they, like you, love strawberries. Just cover the berry plants with plastic netting at the first sign of the berries ripening and make sure the netting is raised above the plants so the birds cannot poke through the holes in the netting. Pick early in the day and pick often to keep them from eating your berries. In wet weather slugs can be a major problem but much less so if you use all natural Slug Magic to keep the slugs at bay!
One last thing: strawberries come as June-bearing plants or ever-bearing plants. June-bearing plants produce all at once, usually in 3 to 4 weeks, while ever-bearing plants produce for a much longer period of 6 to 8 weeks. Both produce about the same amount of berries overall; it depends on how fast you want them for your table. Enjoy! Enjoy!
Thanks to Paul Parent!
Mike Skillin
Skillin's Greenhouses
April 25, 2011
Saturday, April 23, 2011
April Garden Talks: Seed Potatoes and Strawberries
Hello again,
Years ago before we could spell "b l o g" we published some tips on growing seed potatoes and strawberries in the garden. The time is now to plant seed potatoes as well as strawberries in the garden. Here are the updated highlights from our original 2001 Garden Talks about this subject:
"I have borrowed from Jim Crockett of Crockett’s Victory Garden to bring you excerpts of some material from his fine book, Crockett’s Victory Garden:
Potatoes like full sun and a light, sandy soil. They also want an acid soil, as alkalinity will promote the development of a skin disease called scab. So I’ve made a point of keeping the potato area free of lime. If your garden has been limed and you still want to grow potatoes, add sulfur at the rate of ½ pound over the surface of a 15 foot row to lower the pH of the soil to between 4.5 and 5.5, which is just right for potatoes.
At Skillin’s we sell certified seed potatoes by the pound.
I could just plant the whole potato, but I can get more for my money, and a larger yield, by cutting the potato into section about the size of an egg, making sure each section has two or three eyes. I plant each of these sections separately, and each will produce a strong potato plant.
Before the sections go into the ground I dip them in sulfur or captan (fungicides) to prevent rotting of the cut surfaces. Then I leave them exposed to the sunshine and air for 3 to 4 days. This dries out the cut surfaces as a further precaution against rotting when the sections hit the cold, damp soil of early spring.
I dig flat-bottomed trench 6 to8 inches wide and 4 to 5 inches deep. Then I sprinkle in 3 good handfuls of 5-10-10, an excellent potato fertilizer (I recommend using Pro Gro 5-3-4 by North Country Organics or Garden Tone by Espoma), in a 15- foot row and scratch it into the soil so it won’t be in direct contact with the potato sections. I put the potato sections in, cut sides down about a foot apart in the trench and cover them with about three inches of soil. As the plants grow, I’ll pull soil in from the trench to keep the plants cool, a procedure known as hilling or mounding.
Mr. Crockett ( a fraternity brother by the way of David and Jeff Skillin of Alpha Tau Gamma at U Mass Amherst) also offers the following advice about strawberries:
Strawberries grown in the home garden are usually sweeter and richer than any that can be bought in stores.
I set my June-bearing strawberry plants into the ground as early in the spring as possible so that they could become will rooted before the warm weather. I prepared the soil the previous fall by covering it with a layer of 2 inches of cow manure and 4 inches of compost. In the spring I dug both these materials into the soil. It wasn’t necessary to add more lime because a soil test indicated a pH of 5.7, the slightly acid condition ideal for growing strawberries.
Strawberries multiply by sending out runners, or aboveground stems, from the main plants. At approximately every 12 inches along the runners a new plant grows and sets down roots into the soil. For this reason I plant strawberries in what’s known as a matted-row system: the plants grow throughout a 3-foot –wide row.
Strawberry plants have long roots and they need to be planted carefully into a deep slitlike hole. If planted too deeply, the crown is likely to smother and rot; if set too high, the crown will dry out and the plant will die. The idea is to set the plants in the slit so that one-half of the crown is buried below grade, one-half above. I make the hole with the flat-bladed spade, which I insert 8 inches deep at 2-foot intervals along the row. As I slip the plants in, I fan the roots out slightly to separate them and give them a better chance to grow. Then I firm them in and give them a good drink of our transplanting elixir, water and liquid fertilizer (we absolutely recommend Fish and Seaweed Fertilizer by Neptune's Harvest).
June-bearing strawberry plants are undoubtedly the most familiar variety of strawberry, but they are not the only variety, and they’re not, in my opinion, even the best. Ever-bearing, or Alpine, strawberry plants are substantially different from their June-bearing counterparts: for one thing as the name implies, they produce fruit all season long, from the spring through to the first frost; for another, they do not produce runners and so remain as tidy handsome plants throughout their lives; finally, their tartly sweet fruit is beautifully shaped and a rich, deep red.
It’s best to replace strawberry beds every two or three years, because the plants and the soil nutrients will have become too exhausted to produce good crops."
Mike Skillin
Skillin's Greenhouses
April 23, 2010
Years ago before we could spell "b l o g" we published some tips on growing seed potatoes and strawberries in the garden. The time is now to plant seed potatoes as well as strawberries in the garden. Here are the updated highlights from our original 2001 Garden Talks about this subject:
"I have borrowed from Jim Crockett of Crockett’s Victory Garden to bring you excerpts of some material from his fine book, Crockett’s Victory Garden:
Potatoes like full sun and a light, sandy soil. They also want an acid soil, as alkalinity will promote the development of a skin disease called scab. So I’ve made a point of keeping the potato area free of lime. If your garden has been limed and you still want to grow potatoes, add sulfur at the rate of ½ pound over the surface of a 15 foot row to lower the pH of the soil to between 4.5 and 5.5, which is just right for potatoes.
At Skillin’s we sell certified seed potatoes by the pound.
I could just plant the whole potato, but I can get more for my money, and a larger yield, by cutting the potato into section about the size of an egg, making sure each section has two or three eyes. I plant each of these sections separately, and each will produce a strong potato plant.
Before the sections go into the ground I dip them in sulfur or captan (fungicides) to prevent rotting of the cut surfaces. Then I leave them exposed to the sunshine and air for 3 to 4 days. This dries out the cut surfaces as a further precaution against rotting when the sections hit the cold, damp soil of early spring.
I dig flat-bottomed trench 6 to8 inches wide and 4 to 5 inches deep. Then I sprinkle in 3 good handfuls of 5-10-10, an excellent potato fertilizer (I recommend using Pro Gro 5-3-4 by North Country Organics or Garden Tone by Espoma), in a 15- foot row and scratch it into the soil so it won’t be in direct contact with the potato sections. I put the potato sections in, cut sides down about a foot apart in the trench and cover them with about three inches of soil. As the plants grow, I’ll pull soil in from the trench to keep the plants cool, a procedure known as hilling or mounding.
Mr. Crockett ( a fraternity brother by the way of David and Jeff Skillin of Alpha Tau Gamma at U Mass Amherst) also offers the following advice about strawberries:
Strawberries grown in the home garden are usually sweeter and richer than any that can be bought in stores.
I set my June-bearing strawberry plants into the ground as early in the spring as possible so that they could become will rooted before the warm weather. I prepared the soil the previous fall by covering it with a layer of 2 inches of cow manure and 4 inches of compost. In the spring I dug both these materials into the soil. It wasn’t necessary to add more lime because a soil test indicated a pH of 5.7, the slightly acid condition ideal for growing strawberries.
Strawberries multiply by sending out runners, or aboveground stems, from the main plants. At approximately every 12 inches along the runners a new plant grows and sets down roots into the soil. For this reason I plant strawberries in what’s known as a matted-row system: the plants grow throughout a 3-foot –wide row.
Strawberry plants have long roots and they need to be planted carefully into a deep slitlike hole. If planted too deeply, the crown is likely to smother and rot; if set too high, the crown will dry out and the plant will die. The idea is to set the plants in the slit so that one-half of the crown is buried below grade, one-half above. I make the hole with the flat-bladed spade, which I insert 8 inches deep at 2-foot intervals along the row. As I slip the plants in, I fan the roots out slightly to separate them and give them a better chance to grow. Then I firm them in and give them a good drink of our transplanting elixir, water and liquid fertilizer (we absolutely recommend Fish and Seaweed Fertilizer by Neptune's Harvest).
June-bearing strawberry plants are undoubtedly the most familiar variety of strawberry, but they are not the only variety, and they’re not, in my opinion, even the best. Ever-bearing, or Alpine, strawberry plants are substantially different from their June-bearing counterparts: for one thing as the name implies, they produce fruit all season long, from the spring through to the first frost; for another, they do not produce runners and so remain as tidy handsome plants throughout their lives; finally, their tartly sweet fruit is beautifully shaped and a rich, deep red.
It’s best to replace strawberry beds every two or three years, because the plants and the soil nutrients will have become too exhausted to produce good crops."
Mike Skillin
Skillin's Greenhouses
April 23, 2010
Subscribe to:
Posts (Atom)